Packaging is more than a box, bottle, pouch, or wrapper. It is one of the first things customers notice when they see a product. Good packaging can make a product look professional, communicate the brand message, protect the product, and influence a customer’s buying decision.
If you are wondering how to design packaging from scratch, you do not need to start with complicated software or advanced design skills. You need a clear process.
This guide explains how to create packaging from the initial idea to the final print-ready design.
What Is Packaging Design?
Packaging design is the process of creating the visual and structural appearance of product packaging.
It includes:
- Packaging shape and size
- Colors
- Typography
- Logo placement
- Product photography or illustrations
- Product information
- Brand messaging
- Icons and graphics
- Legal information
- Barcode and QR code
- Materials and finishes
- Printing requirements
Packaging design combines branding, graphic design, marketing, and product protection.
For example, packaging for a luxury perfume may use a rigid box, elegant typography, minimal graphics, and premium finishes. A children’s snack product may use brighter colors, illustrations, and playful typography.
The packaging should match both the product and its target customer.
How to Design Packaging From Scratch
Creating packaging from scratch becomes much easier when you divide the project into clear stages.
Step 1: Understand the Product
Before opening Illustrator, Photoshop, Figma, or another design tool, understand what you are designing.
Start by answering these questions:
- What is the product?
- Who will buy it?
- Where will it be sold?
- What problem does it solve?
- What makes it different?
- What size is the product?
- How fragile is it?
- How should it be stored?
- Does it need special protection?
- Is it sold online, in stores, or both?
For example, packaging for a glass skincare bottle needs different structural considerations from packaging for a T-shirt.
The product should always influence the packaging design.
Step 2: Research Your Target Audience
Your packaging should be designed for the people who will actually buy the product.
Consider:
- Age
- Gender, where relevant
- Income level
- Location
- Lifestyle
- Buying habits
- Design preferences
- Expectations from the category
For example, premium skincare customers may respond to clean layouts, sophisticated typography, muted colors, and high-quality materials.
A children’s toy may need a completely different visual approach.
Do not design packaging only according to your personal taste.
Design it for the customer.
Step 3: Study Competitor Packaging
Competitor research helps you understand what is already available in the market.
Search for products similar to yours and examine:
- Colors
- Logo placement
- Typography
- Packaging shapes
- Photography
- Illustrations
- Product claims
- Information hierarchy
- Materials
- Finishes
Create a simple competitor research board.
Look for two things:
What is common?
This tells you the visual language customers already associate with the product category.
What is missing?
This can help you identify opportunities to create a different packaging design.
For example, if every competitor uses white packaging with blue graphics, a different but category-appropriate visual direction could help your product stand out.
However, being different should not make the product confusing.
Step 4: Define the Brand Identity
Your packaging should look like it belongs to the brand.
Before designing, establish the basic brand identity.
This may include:
- Logo
- Brand colors
- Typography
- Photography style
- Illustration style
- Icon style
- Brand personality
- Tone of voice
For example, a luxury brand may use:
- Minimal layouts
- Elegant serif typography
- Limited colors
- High-quality photography
- Premium materials
A modern technology brand may use:
- Clean sans-serif fonts
- Simple graphics
- Strong contrast
- Minimal information
- Modern illustrations
Your packaging should strengthen brand recognition.
Step 5: Determine the Packaging Type
There are many different types of product packaging.
Examples include:
- Boxes
- Pouches
- Bottles
- Jars
- Tubes
- Cans
- Wrappers
- Sleeves
- Cartons
- Bags
- Labels
- Mailer boxes
- Rigid boxes
Choose the packaging format based on the product, customer experience, budget, transportation, storage, and retail requirements.
For example:
Food: pouch, carton, jar, bottle, can
Cosmetics: tube, bottle, jar, carton
Electronics: folding carton, rigid box, protective insert
Clothing: box, bag, mailer, sleeve
Luxury products: rigid box, magnetic box, specialty packaging
Step 6: Get the Packaging Dimensions
This is one of the most important steps.
You need accurate measurements before creating the artwork.
Depending on the packaging type, you may need:
- Width
- Height
- Depth
- Diameter
- Panel dimensions
- Flap dimensions
- Fold positions
- Bleed requirements
- Safe areas
Do not guess these measurements.
Ask the packaging manufacturer or printer for the official specifications.
If you are designing a box, request a dieline.
Step 7: Create or Request the Dieline
A dieline is a technical template showing where the packaging will be cut, folded, glued, or assembled.
It can include:
- Cut lines
- Fold lines
- Glue areas
- Perforations
- Crease lines
- Bleed areas
- Safety margins
A typical box artwork might look like a flat layout containing several connected panels.
The designer places the artwork on this template.
Important
Do not change the dimensions of a manufacturer’s dieline unless you know exactly what you are doing.
Small changes can cause problems during production.
Step 8: Plan the Information Hierarchy
Packaging has limited space.
You cannot give every piece of information the same visual importance.
Decide what customers should notice first.
A typical hierarchy could be:
Level 1
Brand name and product name
Level 2
Main product benefit
Level 3
Important features or claims
Level 4
Supporting information
Level 5
Technical, legal, or regulatory information
For example:
BRAND NAME
Vitamin C Face Serum
Brightening + Hydrating
30 ml
The customer should understand the product quickly.
Step 9: Create a Packaging Content Checklist
Before designing, collect all required content.
Depending on the product and market, this may include:
- Brand name
- Product name
- Product description
- Ingredients
- Directions for use
- Warnings
- Net quantity
- Manufacturer information
- Distributor information
- Country of origin
- Batch information
- Manufacturing date
- Expiry information
- Barcode
- QR code
- Website
- Contact information
- Social media handles
- Certifications
- Recycling information
Some products are subject to specific labeling requirements.
Always verify applicable requirements for the product’s market before sending packaging to print.
Step 10: Choose Your Packaging Colors
Color plays an important role in packaging design.
It can communicate:
- Brand personality
- Product category
- Quality
- Energy
- Freshness
- Luxury
- Sustainability
- Simplicity
For example:
Green: nature, freshness, sustainability
Black: luxury, sophistication, premium positioning
Blue: trust, technology, cleanliness
Yellow: energy, optimism, attention
White: simplicity, cleanliness, minimalism
Do not choose colors only because they look attractive.
Consider how the packaging will look beside competing products.
Also consider whether the colors need to work in CMYK printing, spot colors, or other production processes.
Step 11: Choose Typography
Typography can dramatically change how packaging feels.
You may need:
- Display font
- Heading font
- Body font
- Supporting font
Avoid using too many typefaces.
A simple combination of one or two complementary fonts is often easier to manage.
Check:
- Readability
- Font size
- Letter spacing
- Line spacing
- Contrast
- Hierarchy
Remember that packaging is often viewed quickly.
Important information should be easy to read.
Step 12: Design the Front Panel First
Start with the primary customer-facing panel.
Usually, the front should communicate:
- Brand
- Product name
- Product type
- Key benefit
- Important visual element
- Quantity or size, where applicable
Do not overload the front panel.
A strong front panel should communicate the product quickly.
Step 13: Design the Other Packaging Panels
Once the front is established, move to the other sides.
For example:
Front
Brand + product name + main visual
Back
Product description + instructions + additional information
Side 1
Ingredients or features
Side 2
Barcode + manufacturer information + legal information
Top
Logo or product name
Bottom
Batch/production information or technical details
The exact layout depends on the packaging format and regulatory requirements.
Step 14: Add Photography, Illustrations, or Graphics
Visual elements can make packaging more memorable.
You can use:
- Product photography
- Lifestyle photography
- Illustrations
- Patterns
- Icons
- Abstract graphics
- Textures
- Custom artwork
Make sure images are high enough resolution for the final print size.
Avoid using low-resolution images that look good on a computer screen but become blurry in print.
Step 15: Create a Strong Visual Balance
Packaging should not feel too empty or too crowded.
Look at:
- Alignment
- Spacing
- Margins
- Grid
- Visual weight
- Contrast
- Negative space
- Repetition
A useful approach is to create a consistent grid across the packaging.
This helps different panels feel like part of the same product.
Step 16: Add Barcode and QR Code
If your product requires a barcode, reserve enough space for it.
Do not distort the barcode.
Do not place it over a busy background.
Make sure there is enough contrast for scanners to read it.
If you use a QR code, test it from the expected scanning distance and make sure the final printed version works.
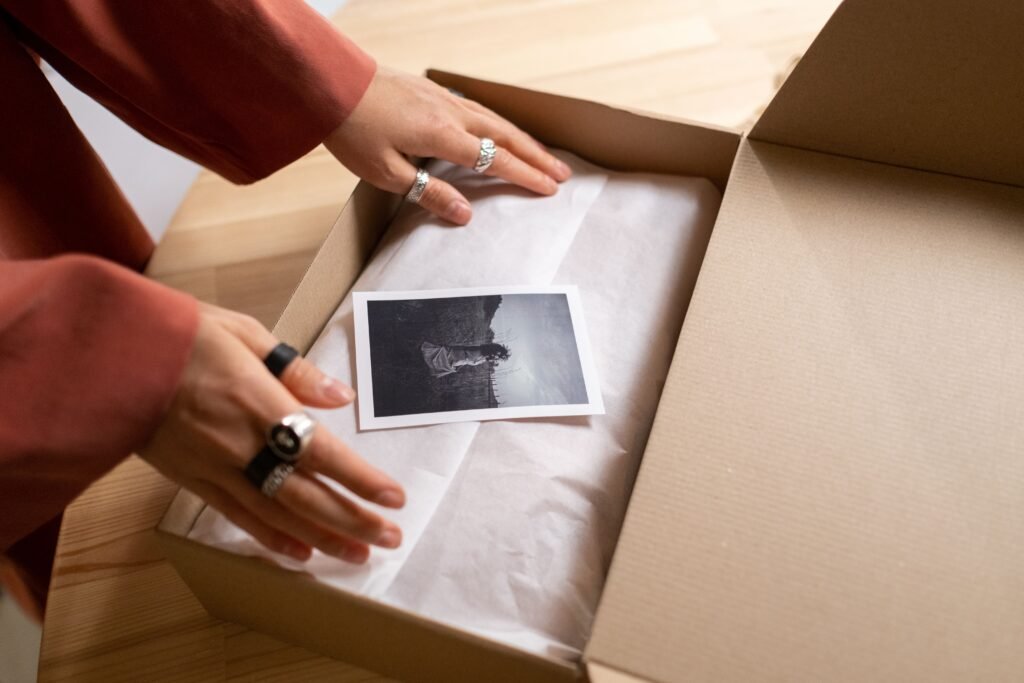
Step 17: Think About the Unboxing Experience
Packaging is not only about the outside.
Think about what happens when the customer opens the product.
You could consider:
- Inner printing
- Thank-you message
- Product instructions
- Tissue paper
- Inserts
- Product cards
- Stickers
- QR codes
- Personalized messages
For premium products, the unboxing experience can become an important part of the brand experience.
Step 18: Create a Packaging Mockup
Before sending your artwork to production, create a realistic mockup.
A mockup allows you to see how the flat artwork will look on the actual packaging.
You can create mockups using:
- Adobe Photoshop
- Adobe Illustrator
- Blender
- Cinema 4D
- Figma
- Specialized mockup tools
Check:
- Logo size
- Text readability
- Color balance
- Panel alignment
- Image positioning
- Overall appearance
A 3D packaging mockup is particularly useful when presenting the concept to a client or team.
Step 19: Print a Physical Proof
A digital mockup is not enough.
Colors and proportions can look different when printed.
If possible, create a physical prototype or proof.
Check:
- Actual dimensions
- Colors
- Text size
- Folding
- Cutting
- Glue areas
- Barcode readability
- Material appearance
- Finishing
- Product fit
This stage can reveal problems before you spend money on a large production run.
Step 20: Choose Packaging Materials
The material affects both appearance and functionality.
Common materials include:
- Paperboard
- Corrugated cardboard
- Kraft paper
- Plastic
- Glass
- Aluminum
- Tin
- Flexible films
- Specialty papers
Consider:
- Product protection
- Cost
- Weight
- Shipping
- Durability
- Sustainability
- Printing quality
- Storage conditions
Your material should support the product positioning while meeting practical requirements.
Step 21: Choose Printing and Finishing
Packaging can use different printing and finishing techniques.
Common options include:
- Digital printing
- Offset printing
- Flexographic printing
- Gravure printing
- Screen printing
Finishing options may include:
- Matte lamination
- Gloss lamination
- Spot UV
- Embossing
- Debossing
- Foil stamping
- Soft-touch coating
- Die cutting
You do not need every finishing technique.
Choose finishes that support the brand and fit the production budget.
Step 22: Prepare the Final Artwork
Once the design is approved, prepare the final production file.
Typical checks include:
- Correct dimensions
- Correct dieline
- Bleed included
- Safe margins respected
- Images high resolution
- Fonts converted or packaged correctly
- Correct color mode
- Correct spot colors
- Barcode checked
- QR code tested
- Links/images embedded where required
- Technical layers clearly organized
Follow the printer’s file specifications rather than relying on generic settings.
Step 23: Export the Print-Ready PDF
Many printers request a print-ready PDF.
However, the exact PDF standard and settings can vary between printers.
Before exporting, ask the printer:
- Which PDF standard do you require?
- What bleed do you need?
- Do you need crop marks?
- Should dielines be separate?
- Do you require spot colors?
- Should fonts be outlined?
- What color profile should be used?
Never assume every printer uses identical specifications.
Step 24: Conduct a Final Prepress Check
Before sending the file to production, perform one final inspection.
Use this checklist:
Design
- Logo is correct
- Product name is correct
- Colors are correct
- Typography is consistent
- Images are high resolution
- Layout is aligned
Content
- Spelling checked
- Product information checked
- Ingredients checked
- Quantity checked
- Contact details checked
- Barcode checked
- QR code tested
Production
- Dieline is correct
- Bleed is correct
- Safe area is correct
- Color mode is correct
- Finishing instructions are included
- Printer specifications are followed
Never rush this stage.
A small packaging error can become expensive once thousands of units have been printed.
Common Packaging Design Mistakes
1. Designing Before Understanding the Product
A beautiful design can still fail if it does not work for the product.
Understand the product first.
2. Using Too Much Information
Too much text makes packaging difficult to scan.
Prioritize important information.
3. Using Too Many Fonts
Multiple fonts can make packaging look inconsistent.
Use a controlled typography system.
4. Ignoring the Dieline
Artwork must follow the actual packaging structure.
Always work from the correct dieline.
5. Using Low-Resolution Images
Images that look fine on a monitor may print poorly.
Use appropriate print-quality assets.
6. Forgetting the Back and Side Panels
Packaging is a 3D object.
Every visible panel matters.
7. Not Checking the Actual Print
A digital mockup cannot replace a physical proof.
Print and inspect the design whenever possible.
8. Copying Competitors
Research competitors to understand the market, not to duplicate their designs.
Your packaging should create a recognizable brand identity.
Packaging Design Software
You can use different tools depending on your workflow.
Adobe Illustrator
Useful for:
- Dielines
- Vector graphics
- Typography
- Print artwork
- Packaging layouts
Adobe Photoshop
Useful for:
- Product images
- Retouching
- Mockups
- Texture effects
Figma
Useful for:
- Early concepts
- Brand systems
- Collaboration
- Presentation
Blender
Useful for:
- 3D packaging visualization
- Product renders
- Realistic packaging scenes
For professional print production, vector-based tools such as Illustrator are commonly used for the final artwork.
How Long Does Packaging Design Take?
The timeline depends on the complexity of the project.
A simple label may take a few days.
A complete packaging system with multiple SKUs, structural design, illustrations, photography, mockups, and revisions can take several weeks.
The process may include:
- Research
- Strategy
- Concept development
- Design
- Revision
- Mockup
- Prepress
- Prototype
- Final production
The number of products and revision rounds can significantly affect the timeline.
How Much Does Packaging Design Cost?
Packaging design pricing varies considerably.
Factors include:
- Packaging type
- Number of SKUs
- Number of concepts
- Illustration requirements
- Photography
- 3D rendering
- Structural design
- Copywriting
- Number of revisions
- Printing requirements
- Production complexity
A simple label design may cost much less than a complete packaging system for a large product line.
If you are a designer, avoid pricing only based on the number of hours required.
Consider the scope, complexity, number of deliverables, revisions, and production requirements.
Packaging Design Process: Simple Version
If you want a simple workflow to follow, use this:
1. Understand the product
↓
2. Research the customer
↓
3. Study competitors
↓
4. Define the brand direction
↓
5. Choose packaging format
↓
6. Get accurate dimensions and dieline
↓
7. Collect required content
↓
8. Create the information hierarchy
↓
9. Choose colors and typography
↓
10. Design the front panel
↓
11. Design the remaining panels
↓
12. Add graphics and images
↓
13. Create a 3D mockup
↓
14. Review and revise
↓
15. Create a physical proof
↓
16. Perform prepress checks
↓
17. Export the final artwork
↓
18. Send to the printer
Final Thoughts
Learning how to design packaging from scratch is not simply about making a beautiful box or label.
Successful packaging design combines brand strategy, customer psychology, visual communication, structural requirements, production knowledge, and marketing.
Start with the product and customer. Research the market. Build a clear visual direction. Work with the correct dieline. Create a strong information hierarchy. Test the design physically before mass production.
The best packaging designs are not necessarily the most complicated.
They are the designs that make the product easy to recognize, easy to understand, visually distinctive, and appropriate for the customer and market.
If you are designing packaging for a real product, use this process as your checklist from the first concept to the final print-ready file.